Most Halloween decor looks great in the store and a little sad in your living room. The plastic skeleton leans, the orange lights clash with your sofa, and the fake webbing ends up stuck to the TV. By mid October the whole room feels like a party store aisle.
Stylish Halloween decor works the other way around. Fewer pieces, darker colors, and softer light do more than a box full of loud props. One candle cluster in a dim corner can feel spookier than a dozen glow in the dark spiders.
These indoor Halloween decorating ideas lean on things you can find at a craft store, a thrift shop, or the back of your own closet. Most take under an hour. None need a drill or a big budget, and almost all of them pack flat into one box when November shows up.
Pick two or three that suit your space and start there. You do not need all twenty.
1. Turn a Console Table Into a Moody Apothecary Display
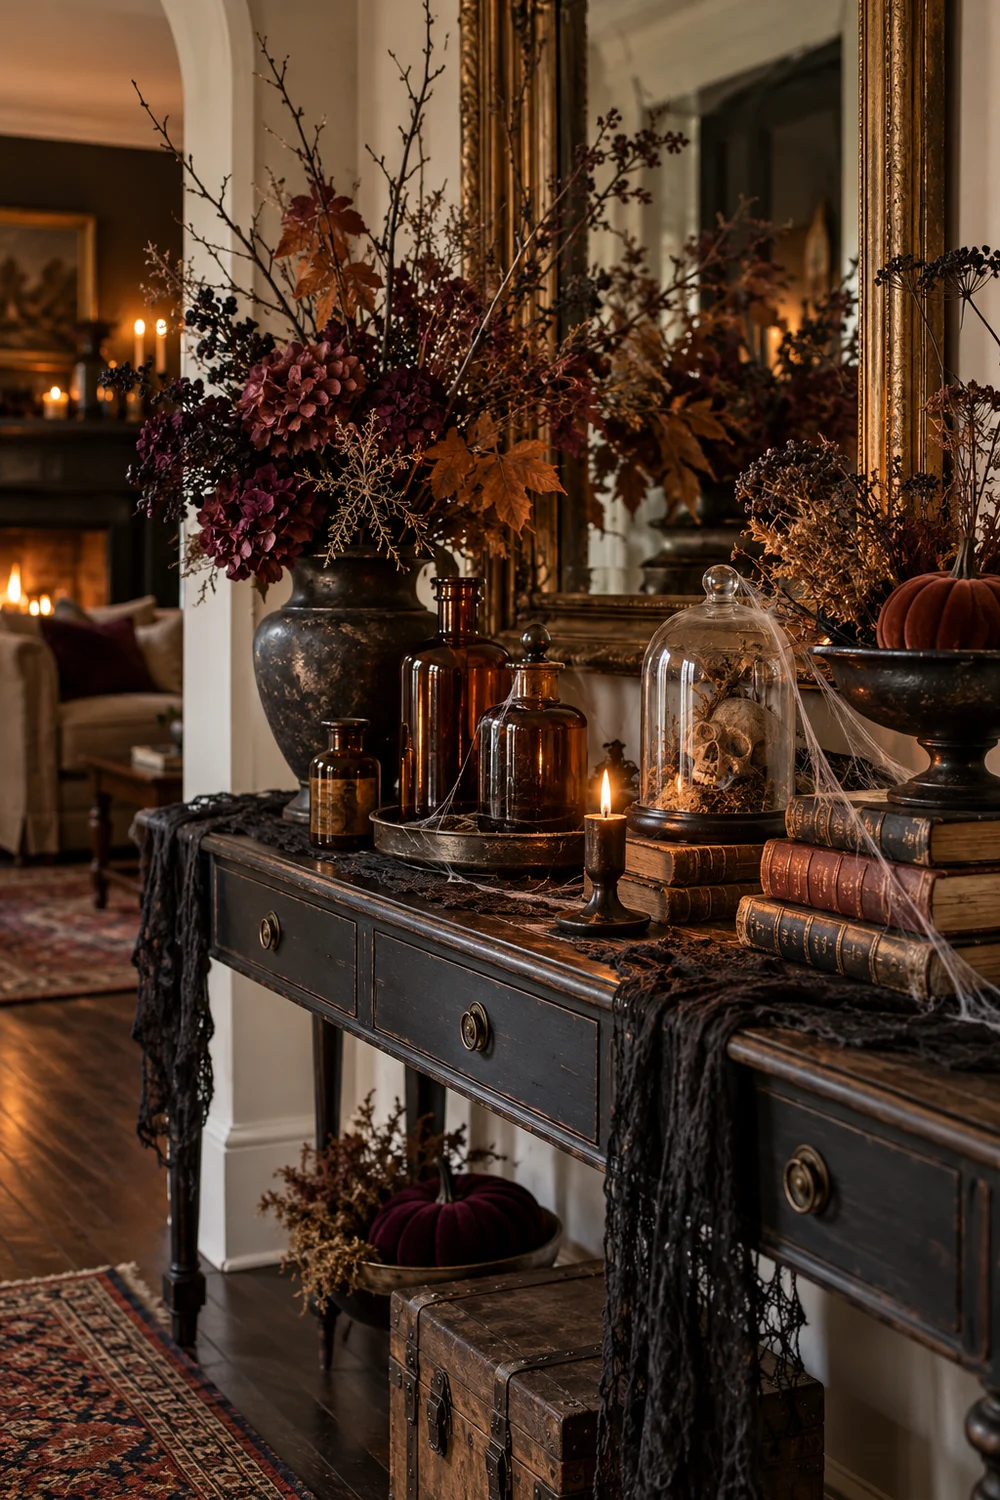
Entry tables collect keys, mail, and that one dish nobody uses.
Clear it off and start fresh with a tray in the middle. Set three amber or brown glass bottles on it at different heights, then tuck a few dried stems into the tallest one. Stack two old books under a candle for extra lift.
- Keep everything on the tray so it reads as one display.
- Stick to brown, black, and cream.
- Leave a little bare table on each side.
2. Hang a Flock of Black Paper Bats Up the Stairwell
Cut ten to fifteen bats from black cardstock in two or three sizes. Fold the paper in half and trim one wing shape so both sides match.
Spacing is what sells it. Real bats bunch up and trail off, so skip the neat diagonal line. Test your tape on a hidden spot first, since some paint peels with it.
1
Stick the biggest bat low, near the bottom step, so it anchors the group.
2
Press a rolled loop of painter’s tape on the back and tilt each bat slightly upward.
3
Space them farther apart as you climb, ending with one small bat near the top.
3. Swap Throw Pillows for Rust, Black, and Plum Covers
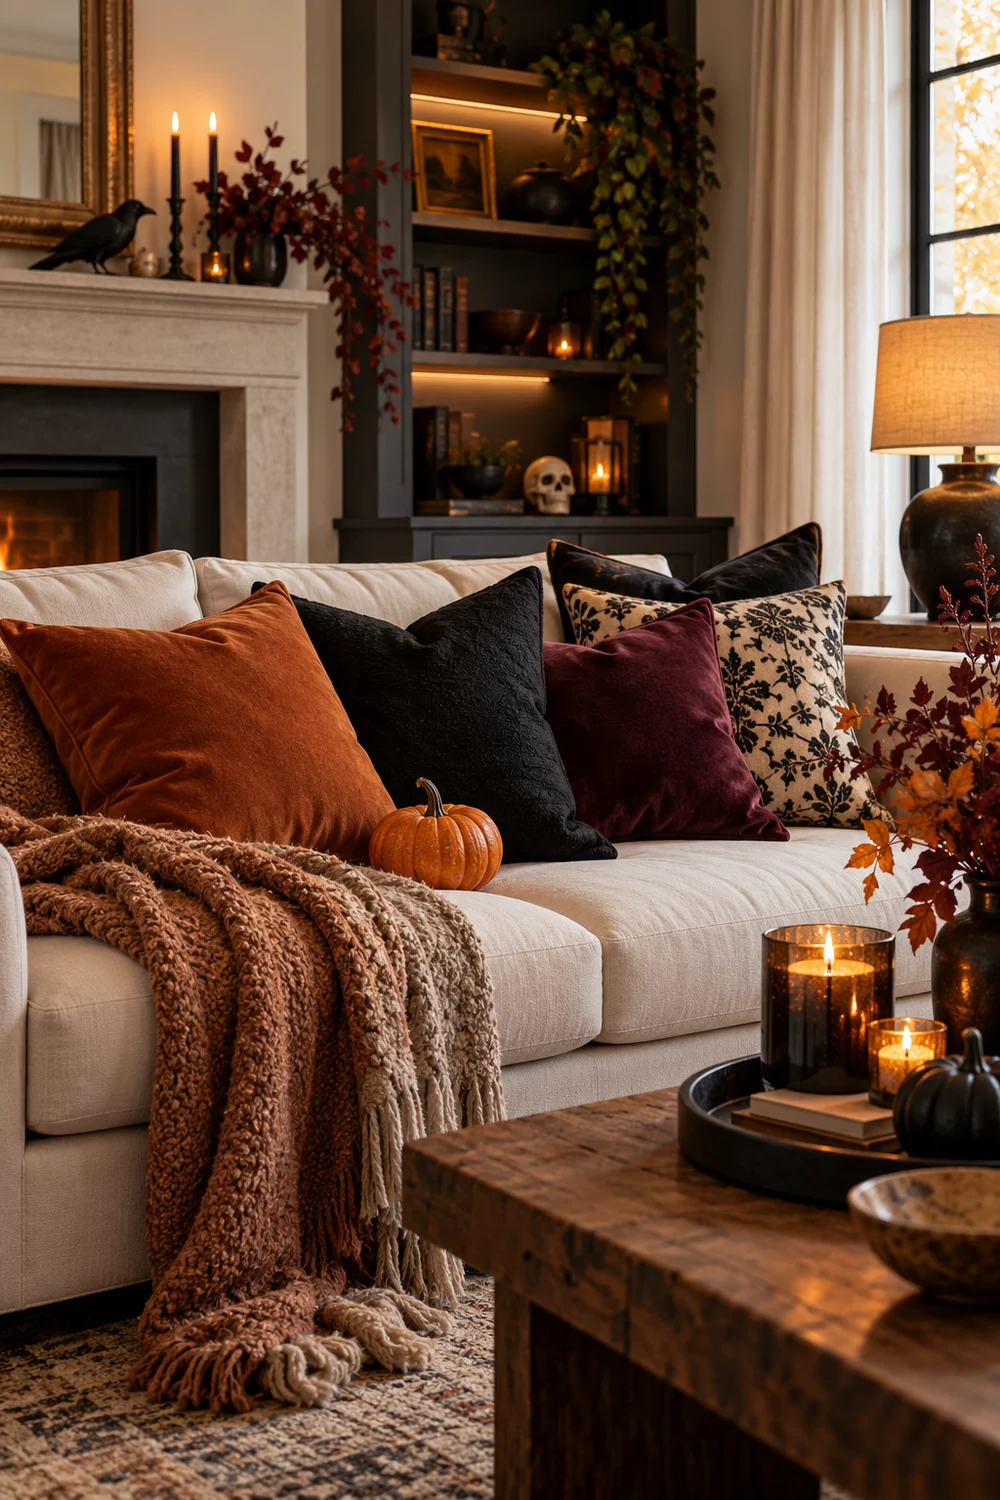
Covers cost less than new pillows, and they fold into a drawer after the holiday.
Keep the inserts you already own and change only the outsides. Velvet and chunky weaves look richer in lamp light than flat cotton does. Allow one pattern at most, like a small check or a faded stripe, and keep the rest solid.
Three covers on a sofa is plenty.
4. Dress the Mantel With Bare Branches and Taper Candles
Dark branches against a pale wall look almost like an ink drawing.
Cut a few from the yard or buy dried ones. Stand them in a tall vase at one end and let them lean. Set taper candles in mismatched holders at the other end, with a gap in the middle so the eye has somewhere to rest.
Skip the garland here. It fights with the branches.
💡 Quick Tip
Use flameless tapers if your mantel is shallow or you have a cat. The ones with a flicker setting look closest to real flame.
5. Paint Craft Pumpkins Matte Black With Gold Stems
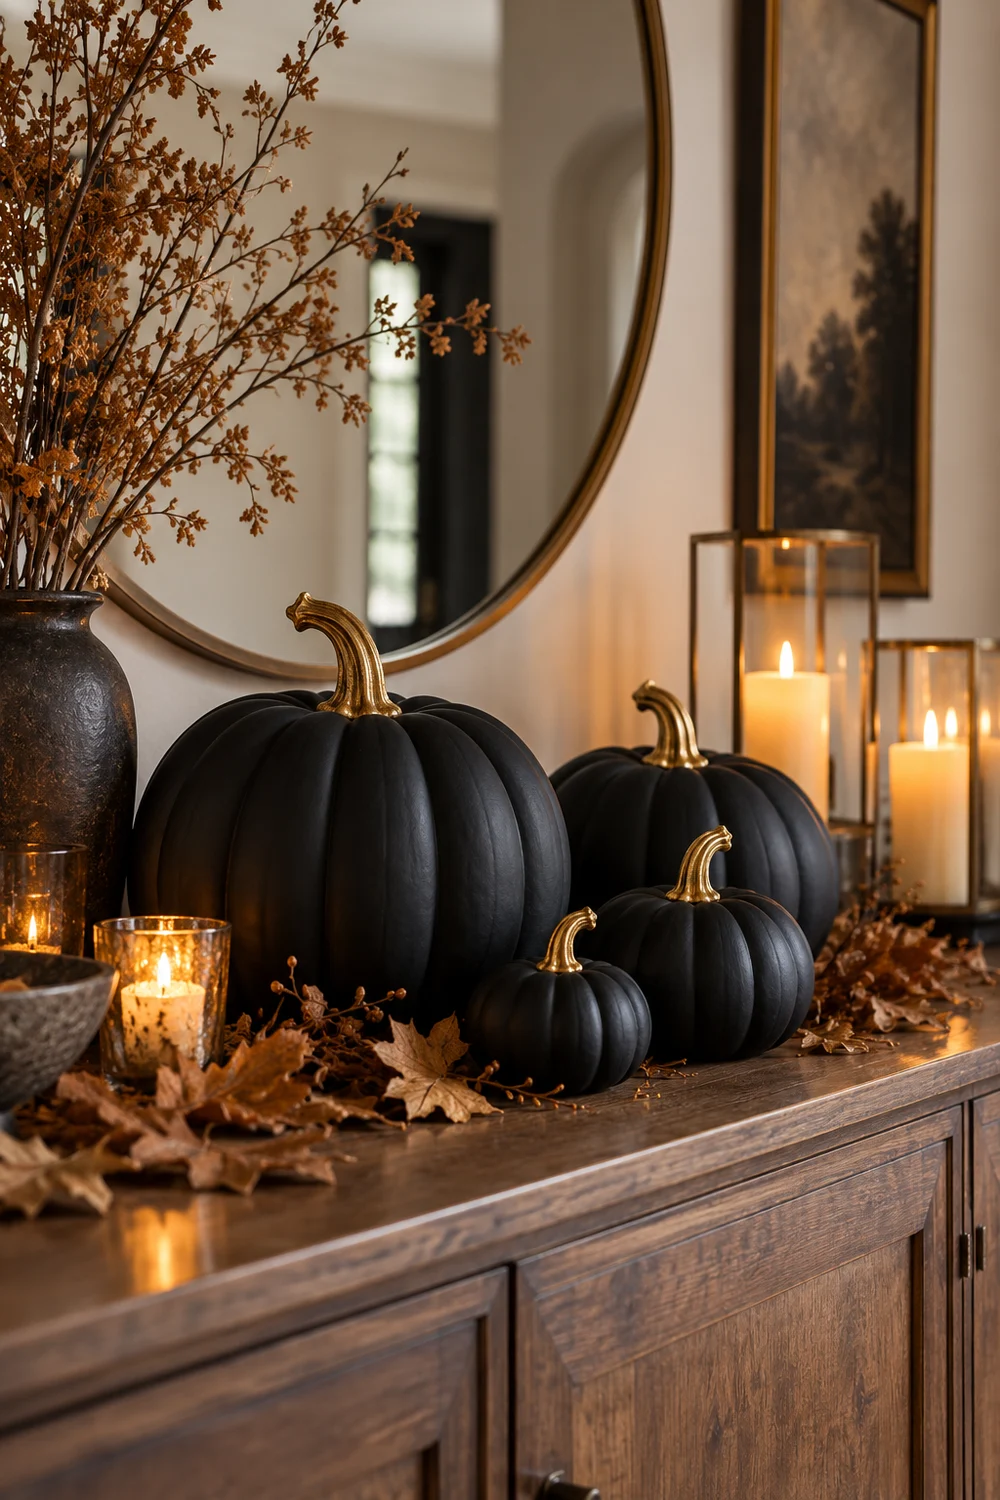
Shiny paint makes craft pumpkins look like plastic. Matte does the opposite.
Use black acrylic or chalk paint and two thin coats, letting the first dry all the way. Then dab metallic gold on the stem with a small brush and stop there. Group three in different sizes on a windowsill or a stair.
Bright orange foam pumpkins with a glossy finish, piled in a bowl.
Matte black pumpkins with gold stems, lined up at uneven heights.
6. Style a Bookshelf With Old Books and One Ceramic Raven
Bookshelves already look a little haunted. You only need to lean into it.
Stack a few books flat and set the raven on top of the pile. Turn a handful of spines inward so only the cream page edges show, which calms down loud covers. Leave one shelf half empty so the raven has room to stand out. Thrift stores are the best place to find worn hardcovers with faded cloth spines.
What to grab first
7. Keep Cobwebs to One Corner Instead of Every Room
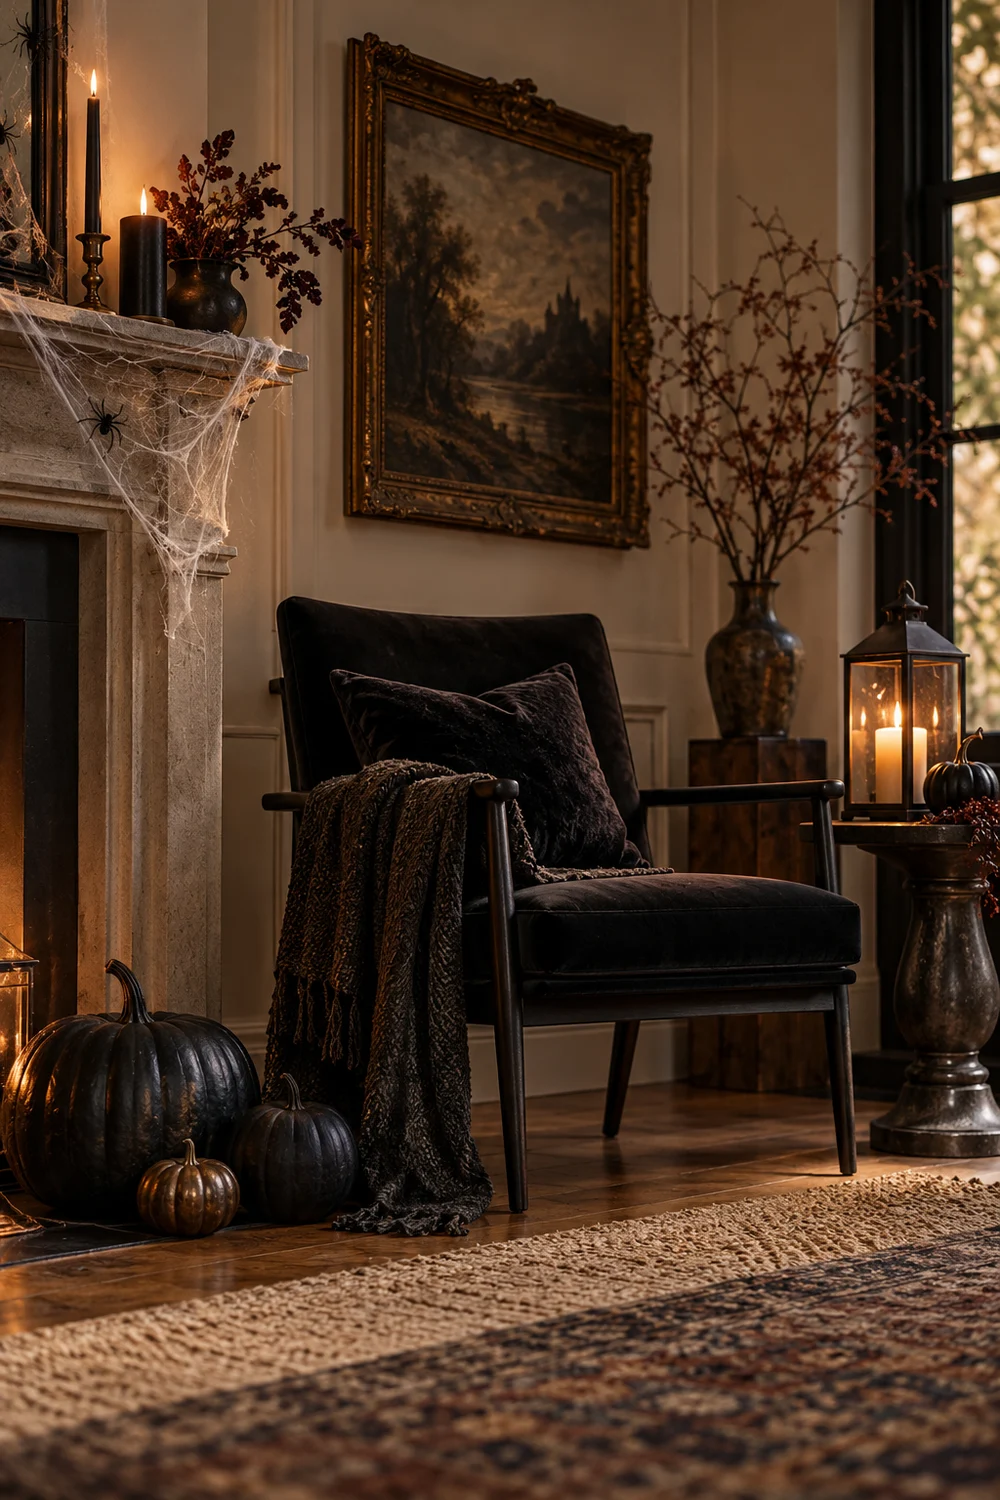
More webbing does not make a room spookier. It just makes it look messy.
Pick one upper corner, like the one above a bookcase or door frame. Pull the stretchy webbing until it is thin and see-through, then press it into the corner and let a few strands hang. Add one small spider and stop. A single, believable web reads as neglected. Webs on every surface read as a costume.
Stretch the webbing thin until you can see through it.
Stick to high corners where real webs form.
Thick white clumps draped over furniture.
Webbing across the TV, lamps, or any warm bulb.
8. Mix Real and Faux Pumpkins on the Entry Bench
Real pumpkins bring the right weight and color. Faux ones bring staying power.
Use both. Set two real pumpkins at the ends of the bench, then fill the middle with a few matte faux ones in cream or dusty gray. Nobody checks, and the group looks fuller. Put a folded wool throw underneath so the bench feels like a seat, not a shelf.
| Real pumpkins | Faux pumpkins |
|---|---|
| Natural dents and uneven color | Smooth and even, so choose matte |
| Soften after a few weeks indoors | Store flat and reuse next year |
| Keep away from heaters | Fine in any spot |
9. Set the Dining Table With Black Linen and Mismatched Candlesticks
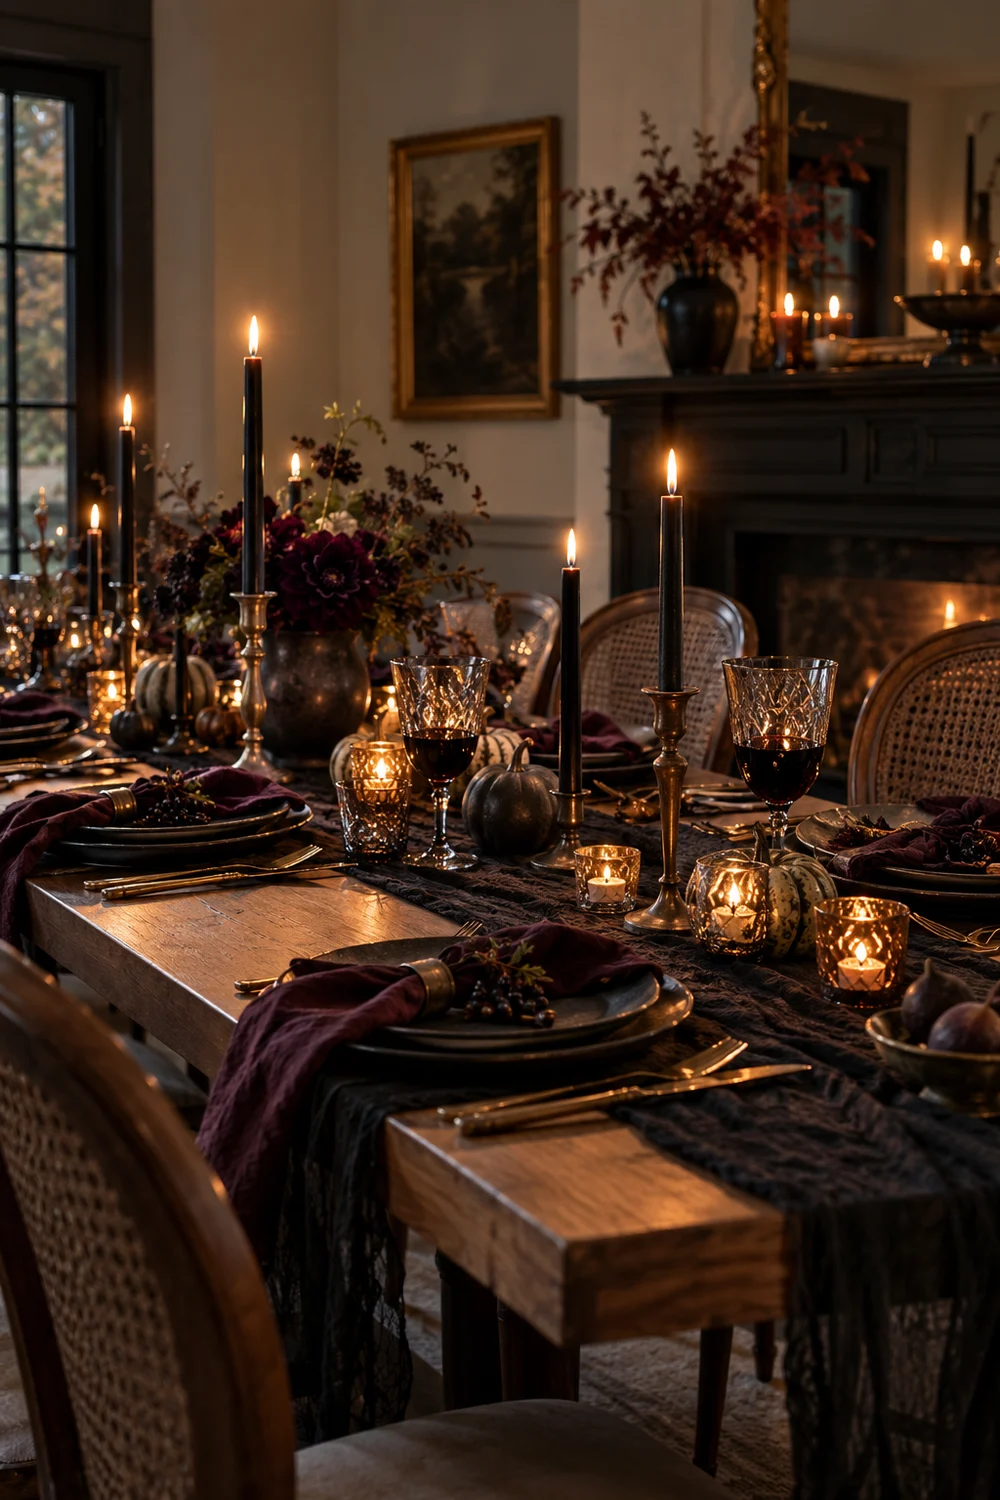
Start with a black linen runner or a dark tablecloth. Cotton napkins in charcoal or rust work too.
Then raid the house for candlesticks. Brass, wood, glass, and ceramic all work together as long as the candles are the same color. Space them unevenly down the middle, with one tall and a couple short.
Plain white plates keep the whole thing from feeling heavy.
Let the candles do the decorating. A dark runner, plain plates, and mismatched holders are all the table needs.
10. Swap Lamp Bulbs to Warm Amber and Dim the Overhead Light
Lighting changes a room faster than any prop.
Replace a few lamp bulbs with warm, low-brightness ones, then turn the ceiling light off in the evening. Shadows grow longer and corners go soft. Put the lamps at different heights, one on a side table and one on the floor, so the glow comes from several places instead of one.
Skip colored party bulbs. Orange or purple tints turn skin and walls odd colors.
⚠️ Watch Out
Check the maximum wattage printed inside each lamp before you swap bulbs, and never drape fabric or webbing over a bulb.
11. Fill Glass Cloches With Moss, Mini Skulls, and One Pumpkin
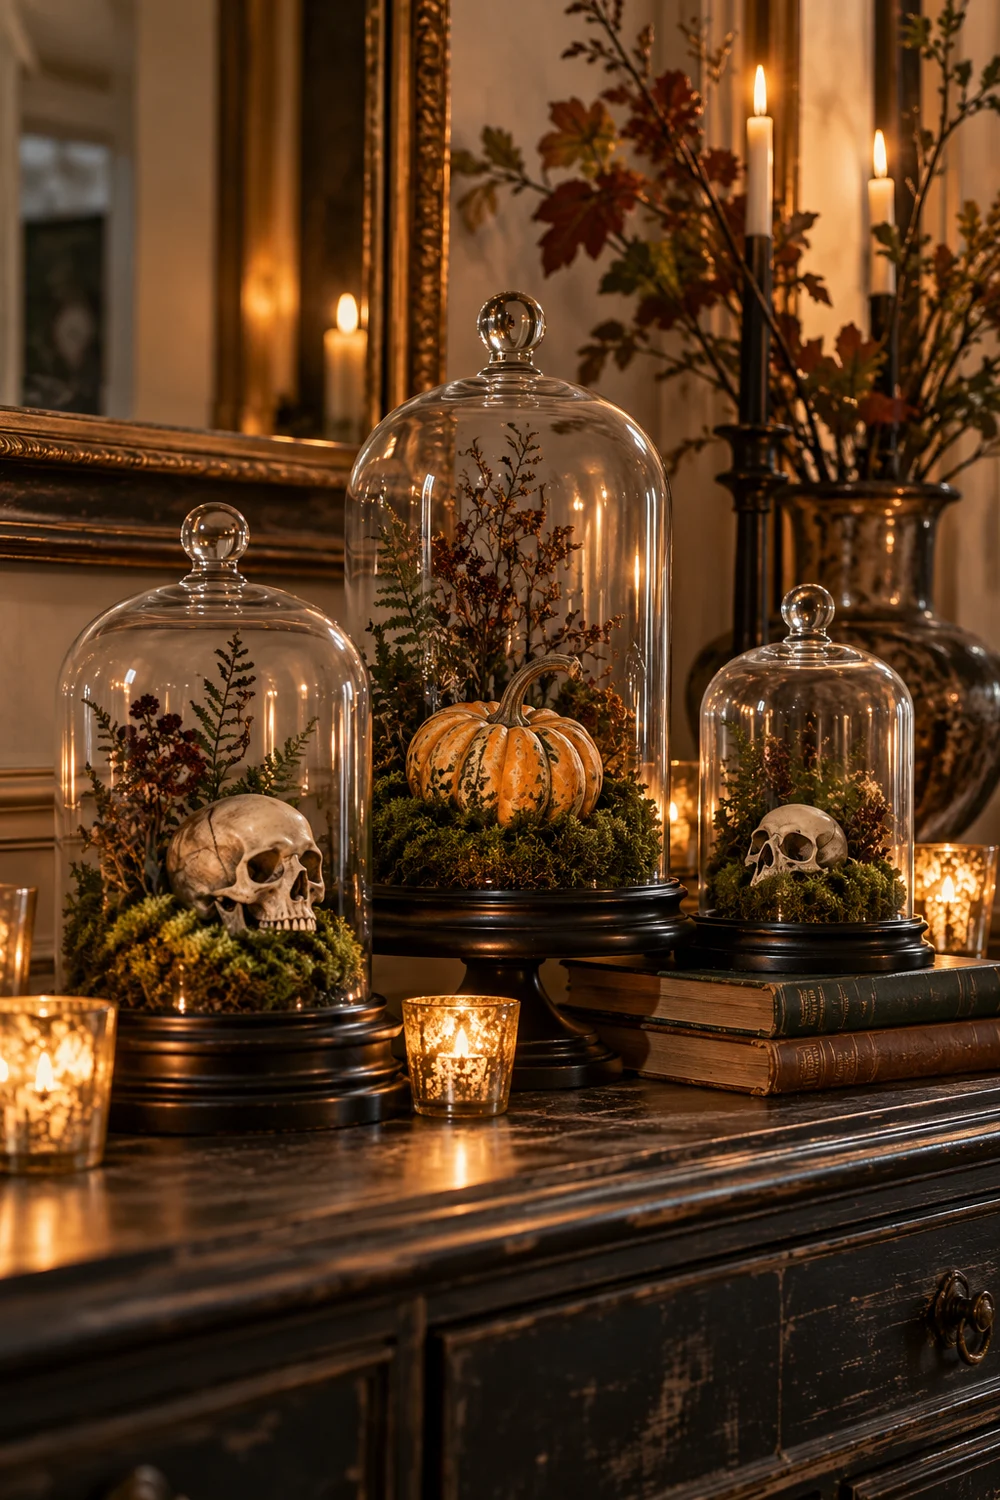
A glass dome makes small things look like they belong in a museum.
Line the base with a handful of dry moss, then add two or three tiny skulls and one small white pumpkin. Keep the pieces off to one side so the dome does not look stuffed. Cloches also keep dust off your props, which helps when the box goes back in the closet. A tall glass vase turned upside down works if you do not own a real one.
12. Build a Candle Cluster on a Tray for a Seance Corner
Candles look best in a crowd.
Pick a quiet corner, like the end of a sideboard or the floor beside a chair, and set a tray there. Gather pillars and tapers in different heights, and mix in a couple of jars. Keep the colors to cream and black so the flames get all the attention.
Flameless candles work just as well if the corner is tight.
1
Set the tallest candle at the back and the shortest at the front edge of the tray.
2
Tuck in one old key, a small mirror, or a bowl of dried petals between the candles.
3
Leave a hand’s width between the tray and any curtain, paper, or shelf above it.
13. Replace Framed Art With Vintage Style Halloween Prints
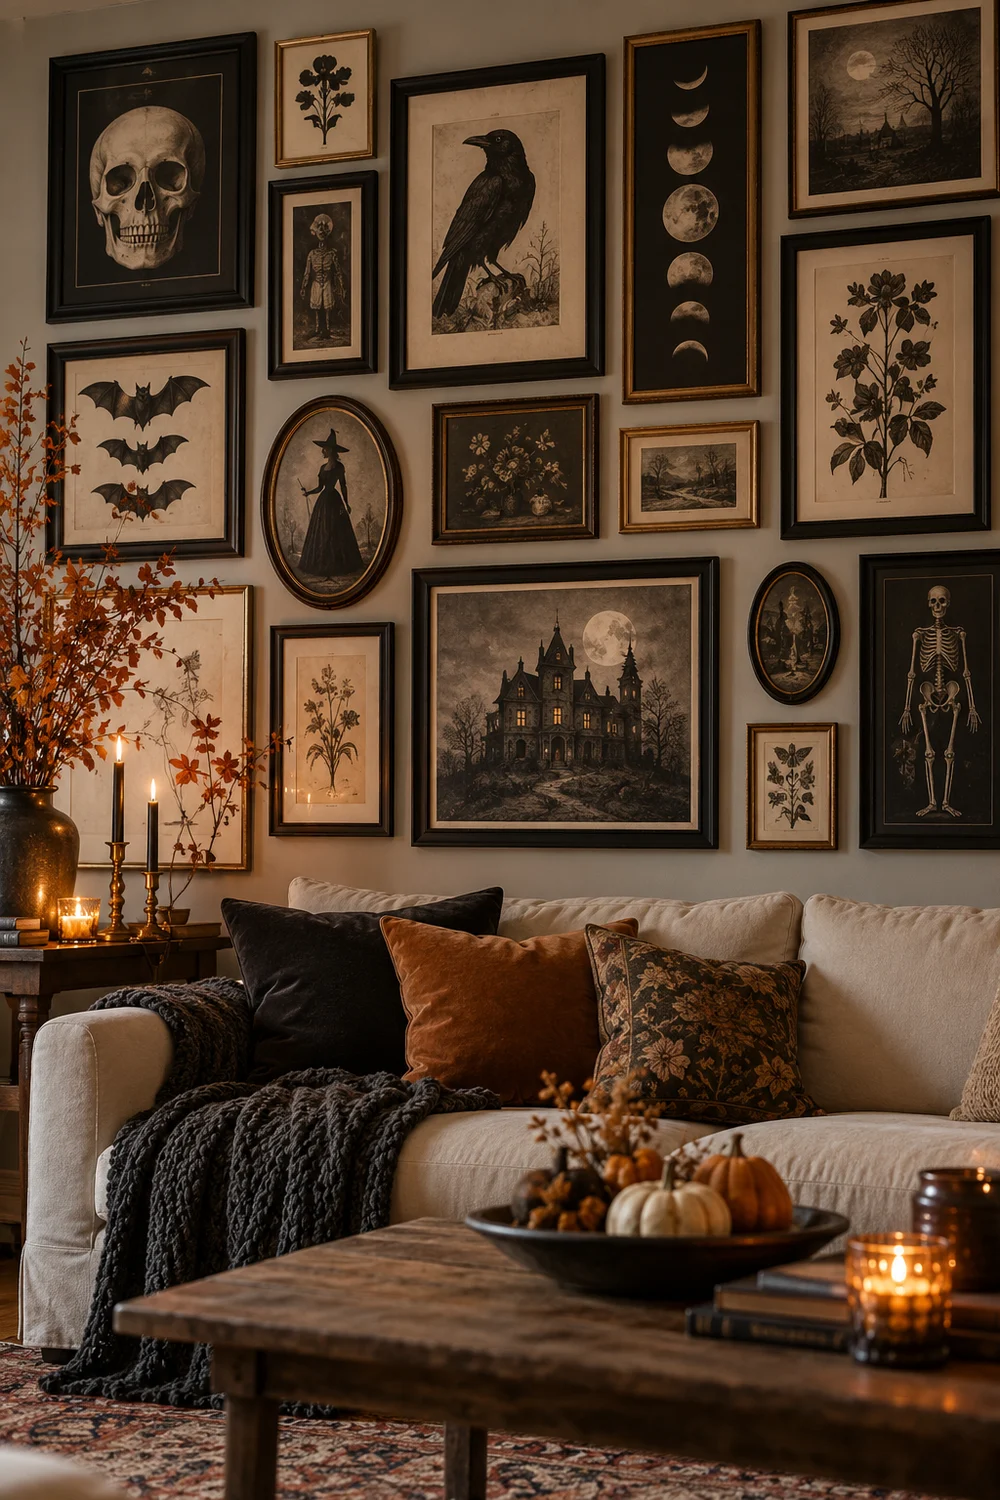
You do not need new frames. Open the ones already on your wall.
Slip in a print with an old fashioned look, like a moth study, a black cat sketch, or a moon phase chart. Sepia and cream tones blend with regular decor, so the room still looks like yours. Slightly crooked groupings feel more relaxed, so hang two or three at mixed heights instead of one lonely frame.
14. Tie a Cheesecloth Ghost to the Back of a Dining Chair
This one costs almost nothing.
Soak a square of cheesecloth in a mix of fabric stiffener, drape it over a balloon or a tall jar, and let it dry overnight. Pop the balloon, lift the shape off, and you have a floaty ghost with a hollow middle. Tie it to a chair back with black ribbon, then add two small dots of black felt for eyes.
- ▸Use one ghost per chair, or only at the two head seats.
- ▸Cut the fabric ragged on the bottom edge so it looks aged.
- ▸Keep ghosts away from candle flames.
15. Frame a Mirror With Black Lace and a Few Feathers
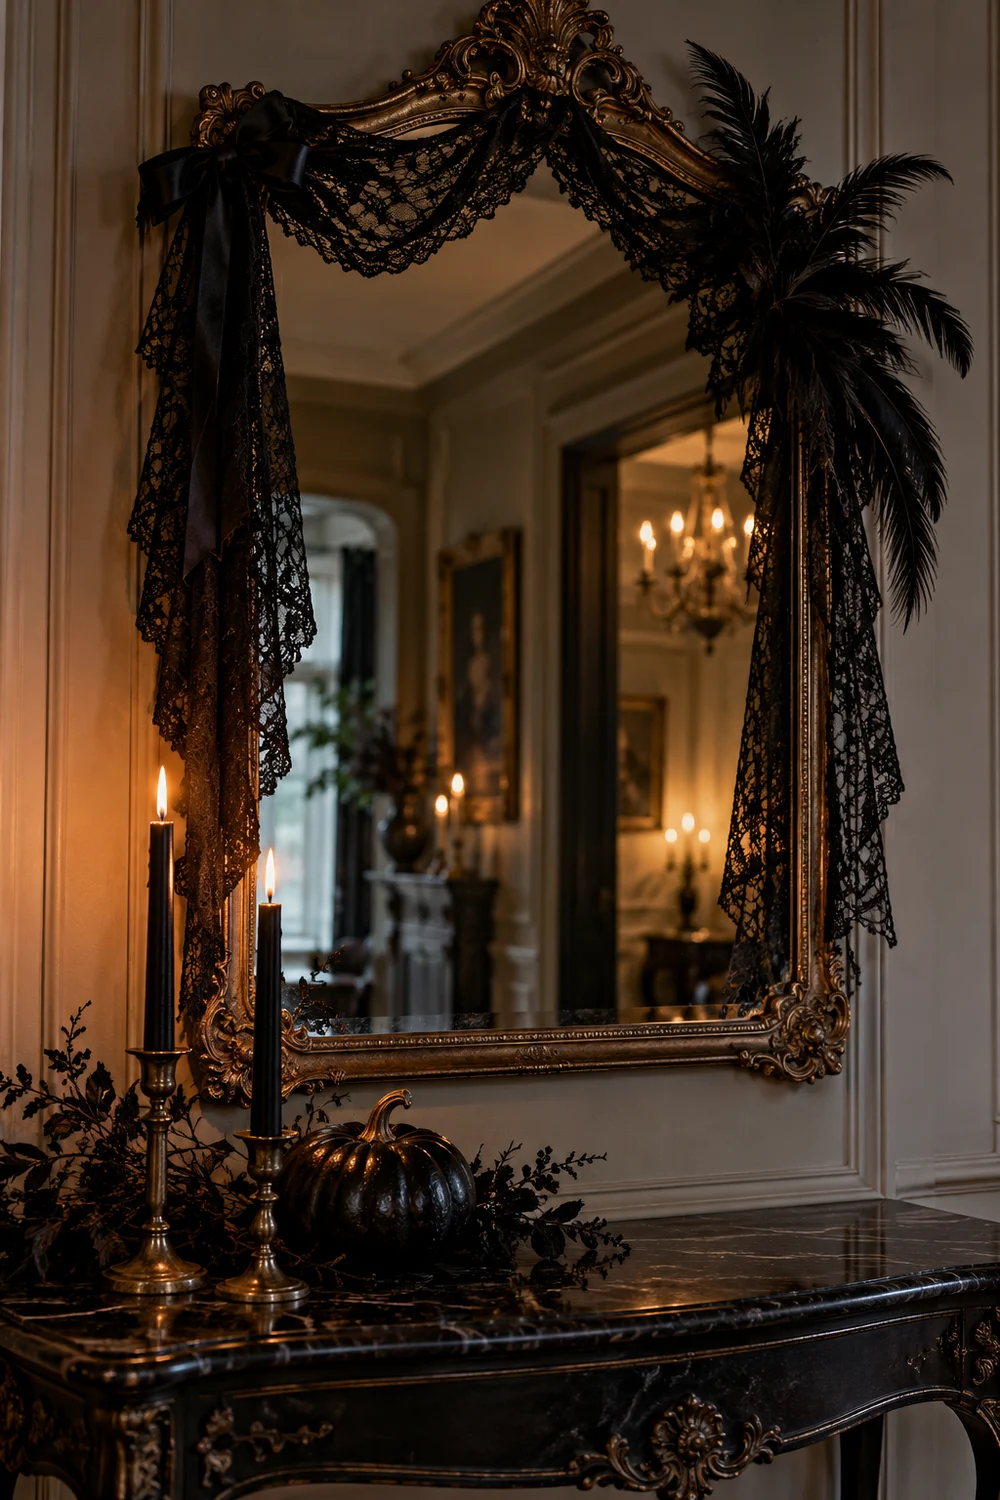
A plain mirror becomes a spooky one with very little effort.
Lay black lace trim along the top and one side of the frame and secure it with removable tape or small pins. Tuck three or four black feathers into the lace at an angle. Lean toward asymmetry, since a fully wrapped frame can look like a craft project.
Hang it near a lamp, not a candle, because lace and flame do not mix.
A plain hallway mirror with a clean frame and nothing around it.
Black lace draped across one corner, with a few feathers tucked in.
16. Relabel Kitchen Jars Into a Witch’s Potion Shelf
The jars are already in your cupboard. They just need new names.
Pick five or six glass jars with lids, like pasta jars, old pickle jars, or spice bottles. Print small labels on cream paper, tear the edges, and tape them on. Write things like “moon dust” for flour, “bat wing” for dried bay leaves, and “root of mischief” for ginger. Set them on an open shelf or the kitchen counter, grouped by height.
Gather before you start
17. Hang One Oversized Skeleton in a Doorway and Stop There
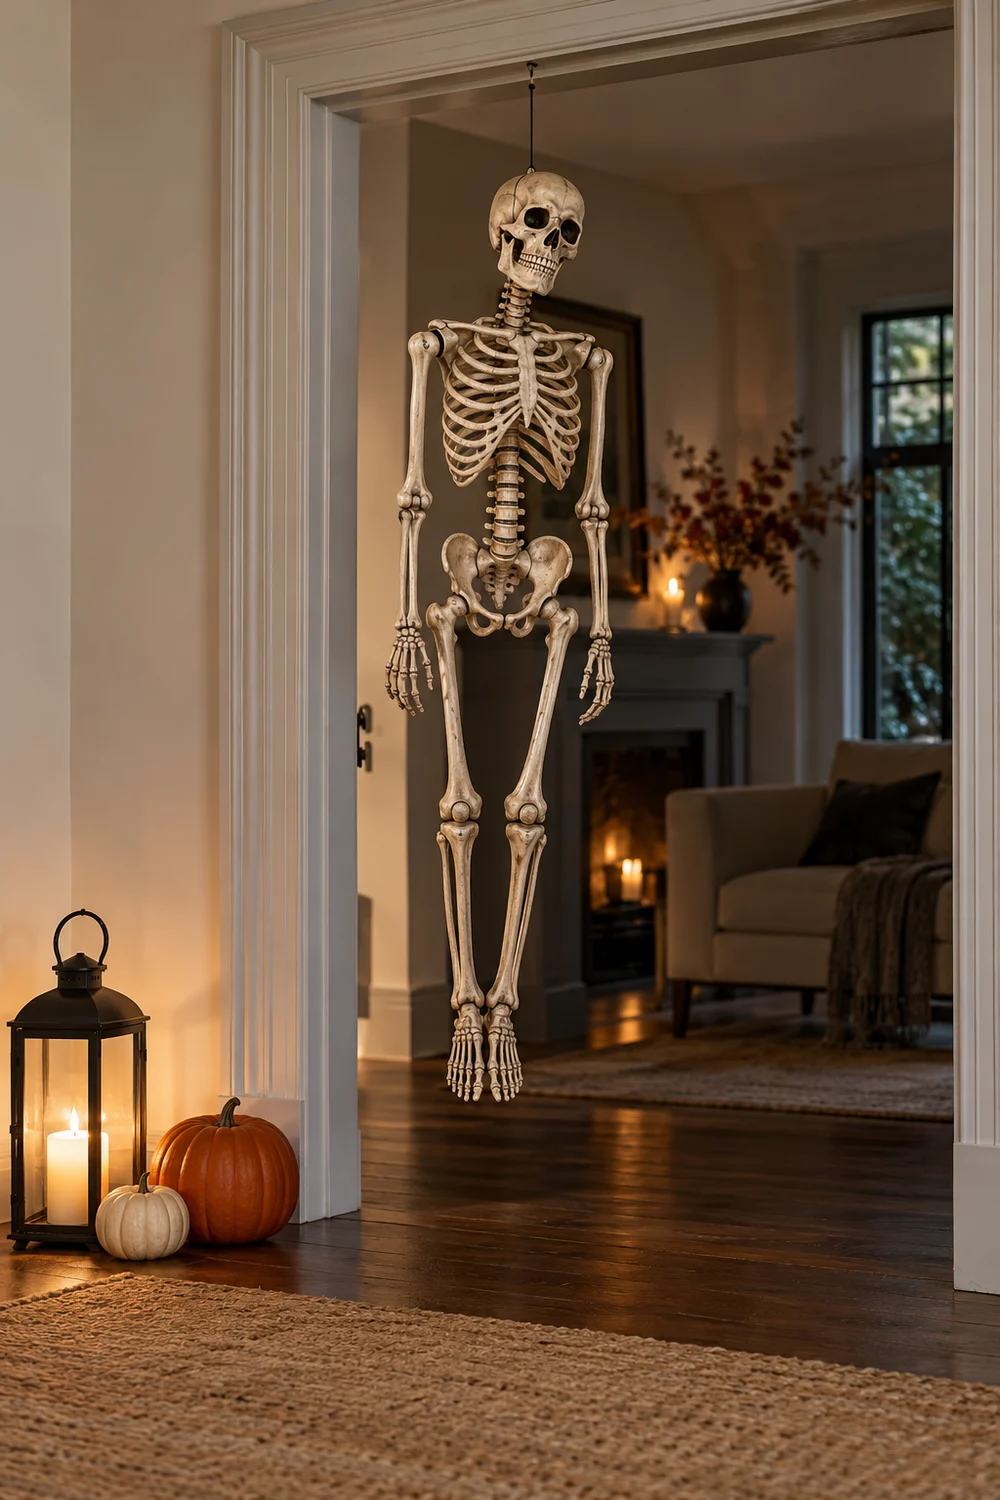
Big props work when they stand alone.
Choose the doorway guests walk through most, like the one into the dining room or hallway. Hang the skeleton from the top of the frame with clear fishing line so it looks like it is floating. Leave the rest of that room fairly calm. One bold piece with quiet space around it gets noticed. Five of them just compete.
Hang it just above head height so nobody walks into it.
Pick a bone white or aged cream finish.
A second skeleton in the next room.
Glow in the dark eyes or flashing lights.
18. Hang a Dried Flower Wreath on an Interior Wall, Not the Door
Front door wreaths get weather. Indoor ones get a spot over the sofa.
Choose dried flowers in deep colors, like burgundy, rust, and dark brown, then add a few black stems for contrast. Hang it on a bare wall, above a sideboard, or on the back of a cabinet door. Indoors, it will keep its shape until spring if you leave it alone.
Use a flat hook, not a nail, if you rent.
| On the front door | On an interior wall |
|---|---|
| Fades in sun and rain | Holds its color for months |
| Only visitors see it | You see it every day |
| Fragile stems break in wind | Easy to rework into winter decor |
19. Make a Reading Nook With a Dark Throw and a Lantern
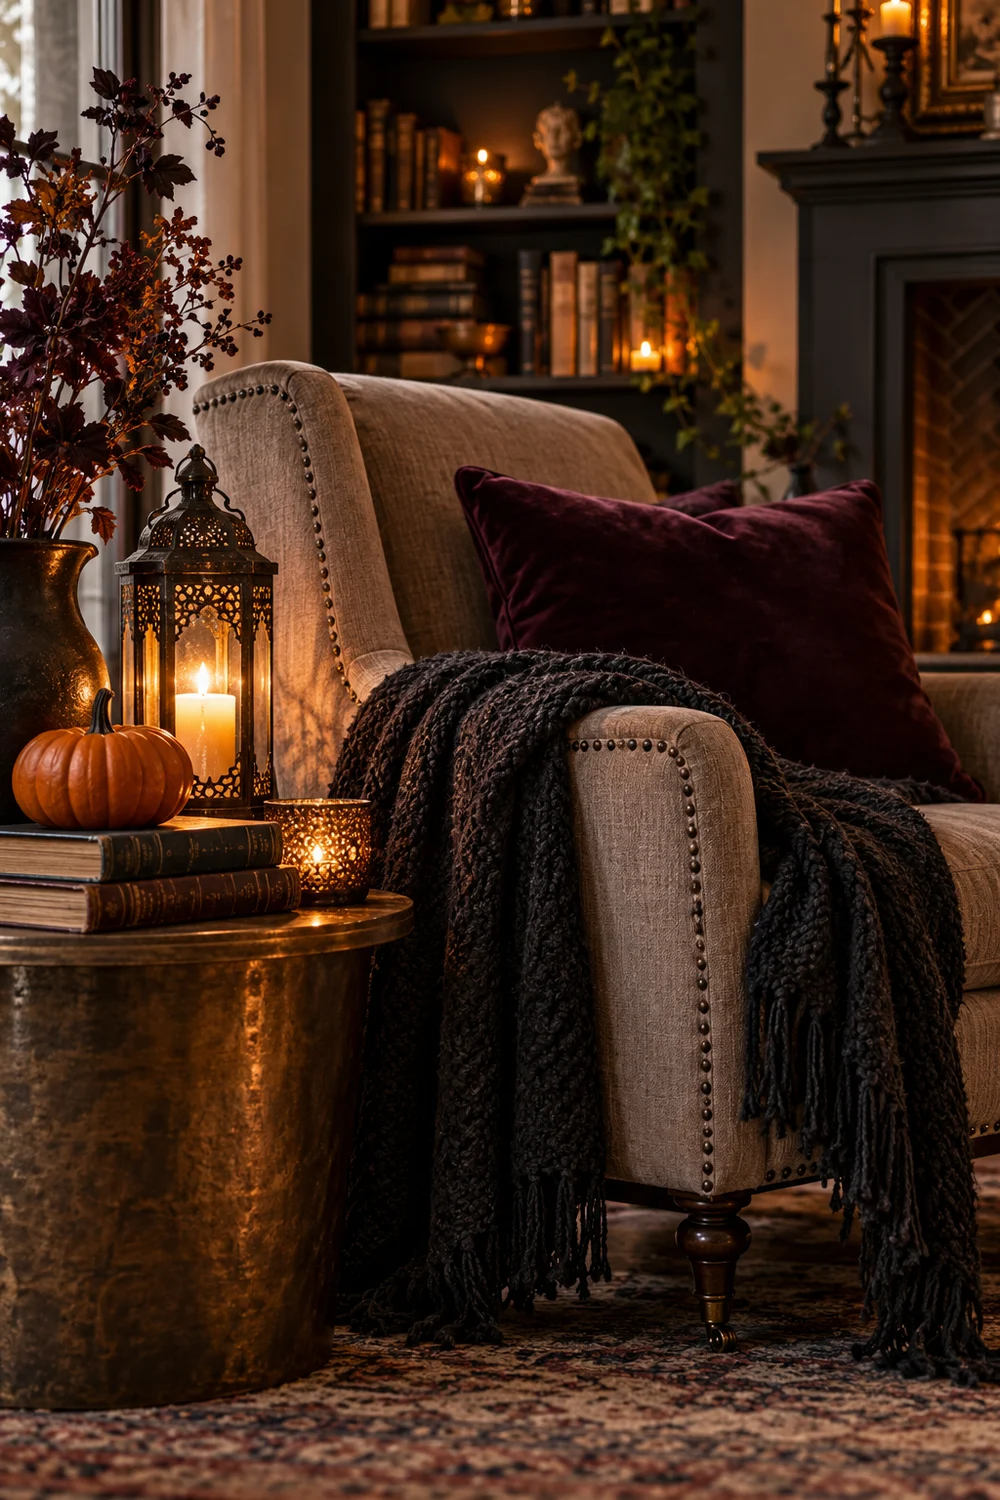
Every home has one chair nobody sits in. Give it a job.
Drape a dark wool or knit throw over the arm, and set a small lantern on the floor or a stool beside it. Add a stack of two or three books and a mug. Nothing else is needed. The nook should look like someone just stepped away, which makes it feel lived in instead of staged.
Add something to sit with, not just something to look at. A throw, a light, and a book make a corner feel inviting.
20. Set Up a Grown Up Candy Station on the Sideboard
Candy dishes do not have to be plastic cauldrons.
Use glass jars, a footed cake stand, and a wooden board. Fill them with dark chocolate, licorice, caramels, and anything wrapped in black or gold foil. Set small tongs or a scoop beside each one and a stack of paper bags for guests to fill.
Group by color so the table looks planned.
📌 Good To Know
Keep nut-containing candy in its own jar with a small label, so guests with allergies can skip it easily.
Make Your Home Look Spooky Without the Clutter
Good Halloween decor does not need a full box of props. A few dark colors, softer light, and one or two bold pieces will change how a room feels, and most of it tucks into a single bin once the month is over.
If you are choosing from these indoor Halloween decorating ideas, start small. Pick one corner, one table, and one change in lighting. See how the room feels after a night or two, then add more only if it still needs it. Your home will look like itself, just a little more mysterious.
Save this list to your Halloween board on Pinterest so it is ready the next time you want to decorate.