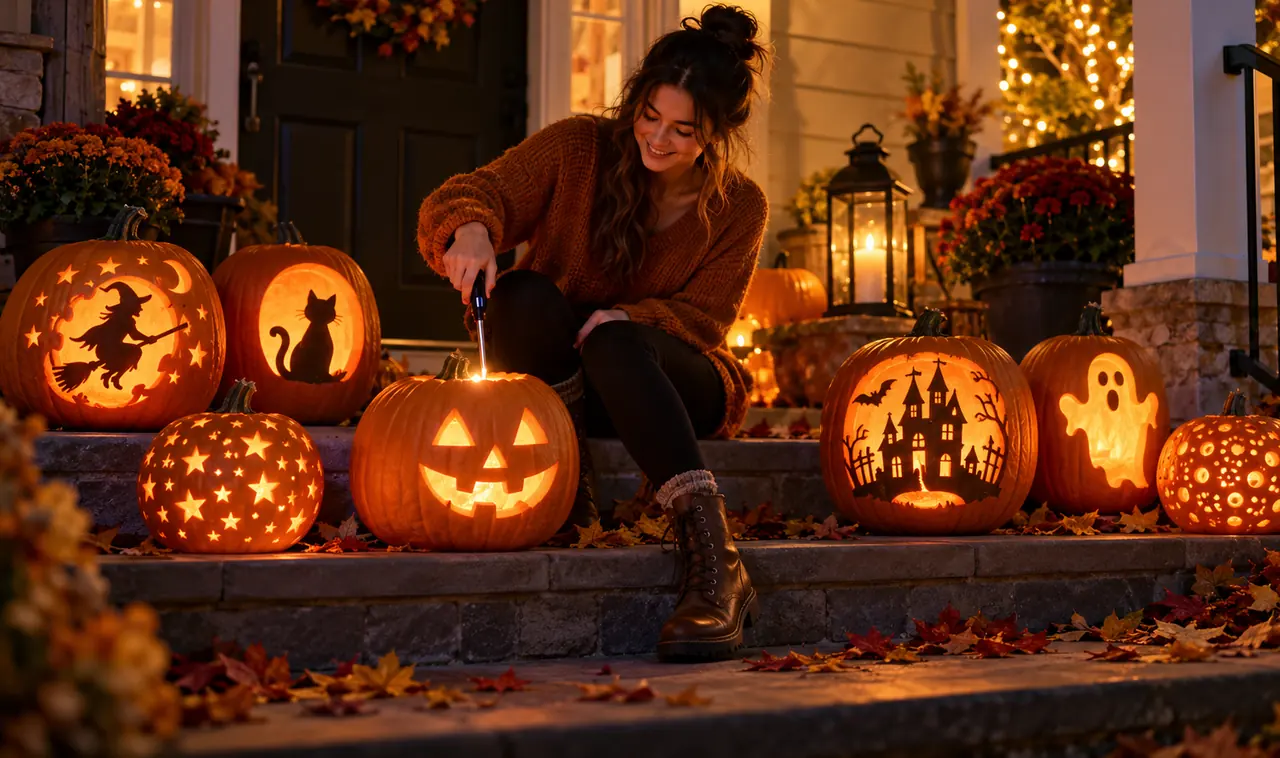
Most jack-o-lanterns peak at noon and fade by midnight. You carve the perfect grin, light a candle inside, and once the sun drops it turns into a dim orange blob on the porch. Features blur, details vanish, neighbors walk right past.
The fix is simple: carve for the dark, not the daylight. A pumpkin that glows is a different project from a pumpkin that photographs well at lunch. Thin walls, small holes, layered cutouts, and the right light source matter more after sunset than any fancy design does in full sun.
These glowing pumpkin-carving ideas are built for nighttime. Each one treats light as part of the design, so your pumpkins look sharper, brighter, and stranger once it gets dark. Grab your tools after dinner and carve something the whole street slows down to see.
1. Drill Tiny Holes for a Starry Sky Effect
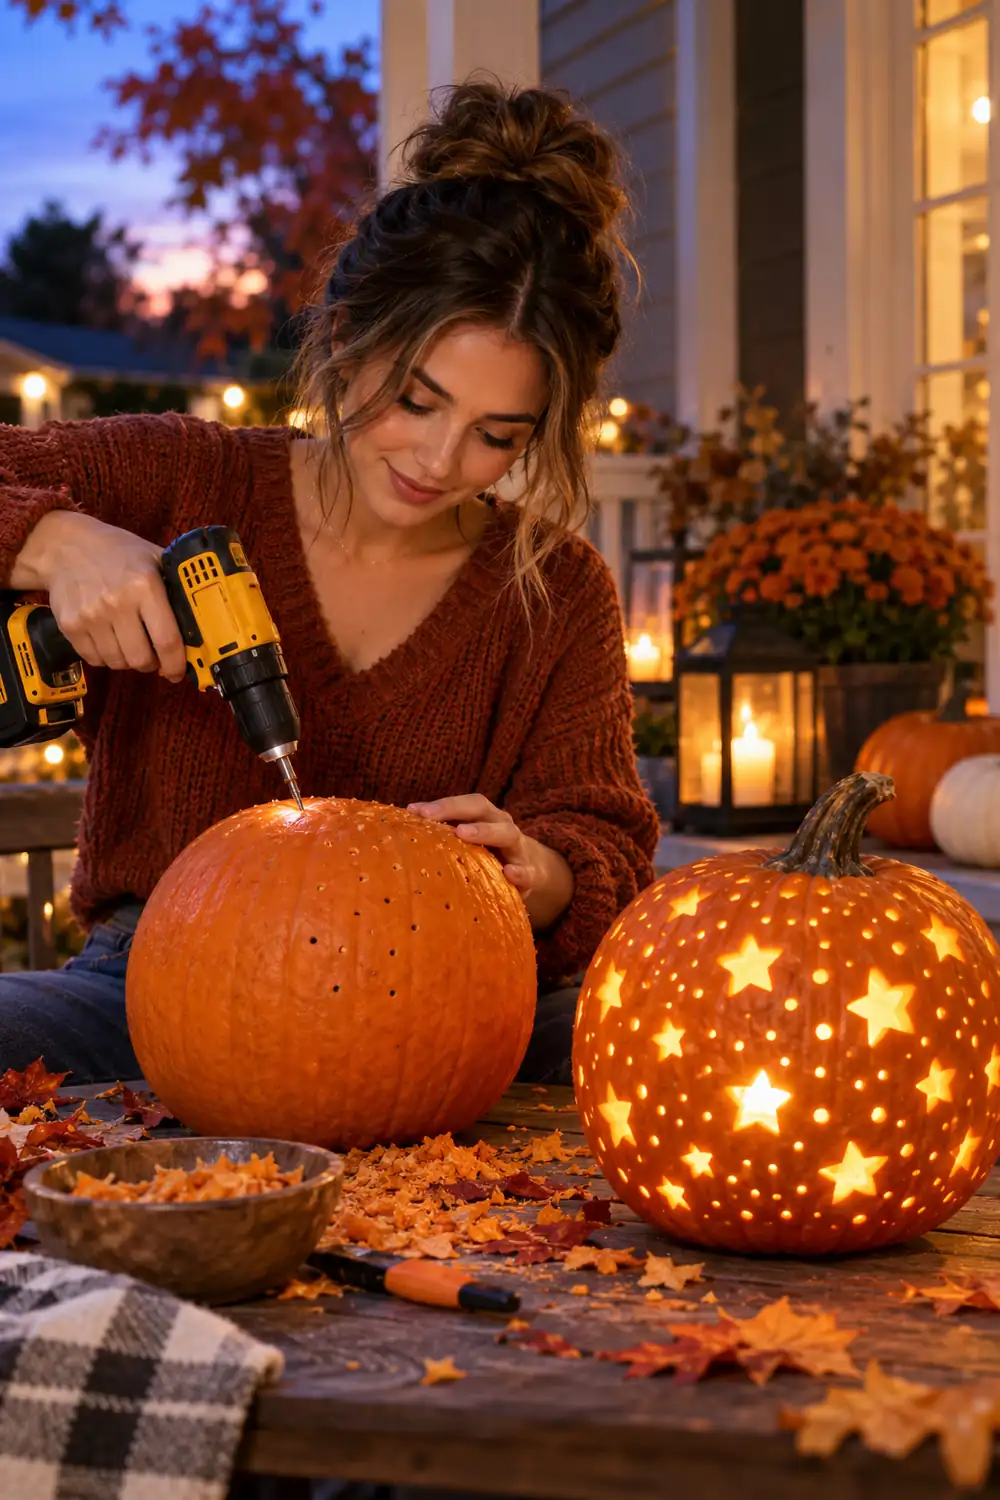
Big cutouts leak light everywhere. Tiny holes focus it.
A drill turns your pumpkin into a small planetarium. Mark a constellation on the skin first, real or invented, then drill two hole sizes: small for background stars, larger for the heroes. Keep holes a finger width apart so the wall stays strong.
- Use a 1/16 inch bit for background stars
- Use a 1/4 inch bit for the main stars
- Drill from the outside in for cleaner edges
Lit up, pinpricks spray across the porch wall. Pure magic from the sidewalk.
2. Carve a Haunted House With Lit Windows
A haunted house only works if the windows glow.
Carve the house as a solid silhouette and cut the windows all the way through. Dark shape, bright window squares: that contrast does the work. Add a crooked chimney and a dead branch. Keep window cuts small so they read as warm squares, not white blobs.
💡 Quick Tip
Face the windows toward the street. A haunted house with its back to the road wastes its best feature.
Two tea lights beat one big candle. The extra source fills every window.
3. Brush On Neon Paint and Hit It With Blacklight
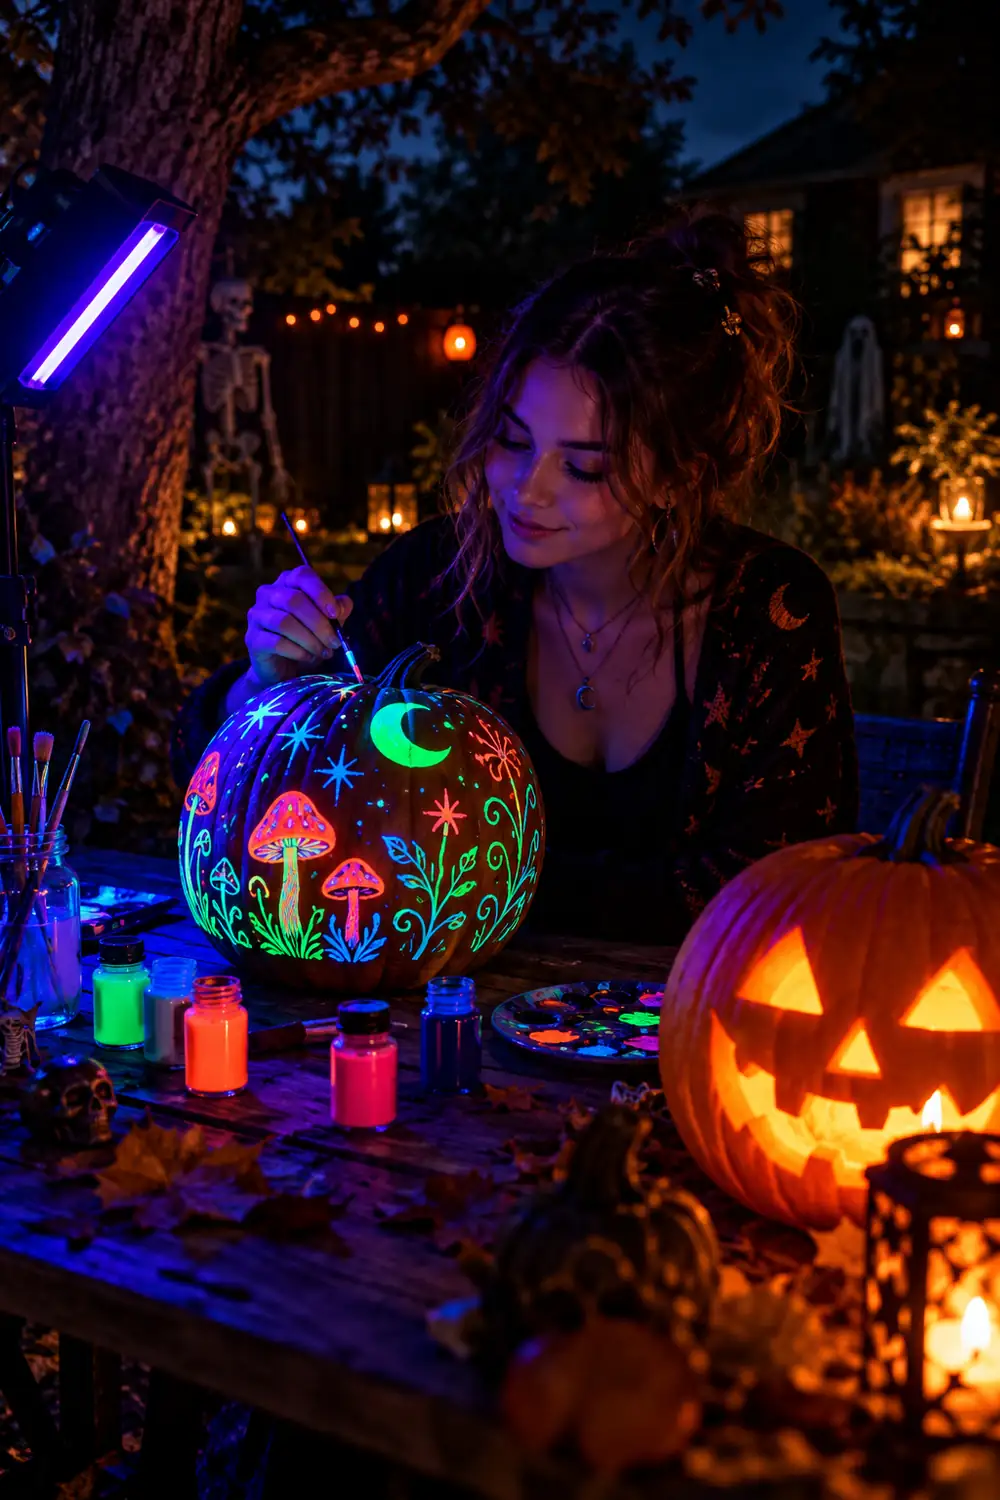
Some pumpkins should never meet a knife.
Neon craft paint glows hard under a blacklight. Paint swirls or a skull outline on the skin, then aim a blacklight clamp lamp a few feet away. The paint buzzes while the carved parts glow warm inside. Two light shows, one pumpkin.
New to carving? Start with these easy pumpkin-carving ideas to learn the basic cuts, then add paint as your glow upgrade.
- Use acrylic neon paint, not washable kids paint
- Two thin coats glow brighter than one thick coat
- Keep the blacklight dry and away from eyes
4. Stack Mini Pumpkins Into a Glowing Totem
One pumpkin is a lantern. Three is a landmark.
Pick three small pumpkins in descending sizes. Carve a simple face on each: sleepy eyes at the bottom, a grin in the middle, star eyes on top. Cut a hole through the bottom of the upper two so light travels up, and dowel the centers for windy nights.
Set the totem where porch meets steps. The stacked glow reads from far down the block.
5. Cut a Crescent Moon Surrounded by Stars
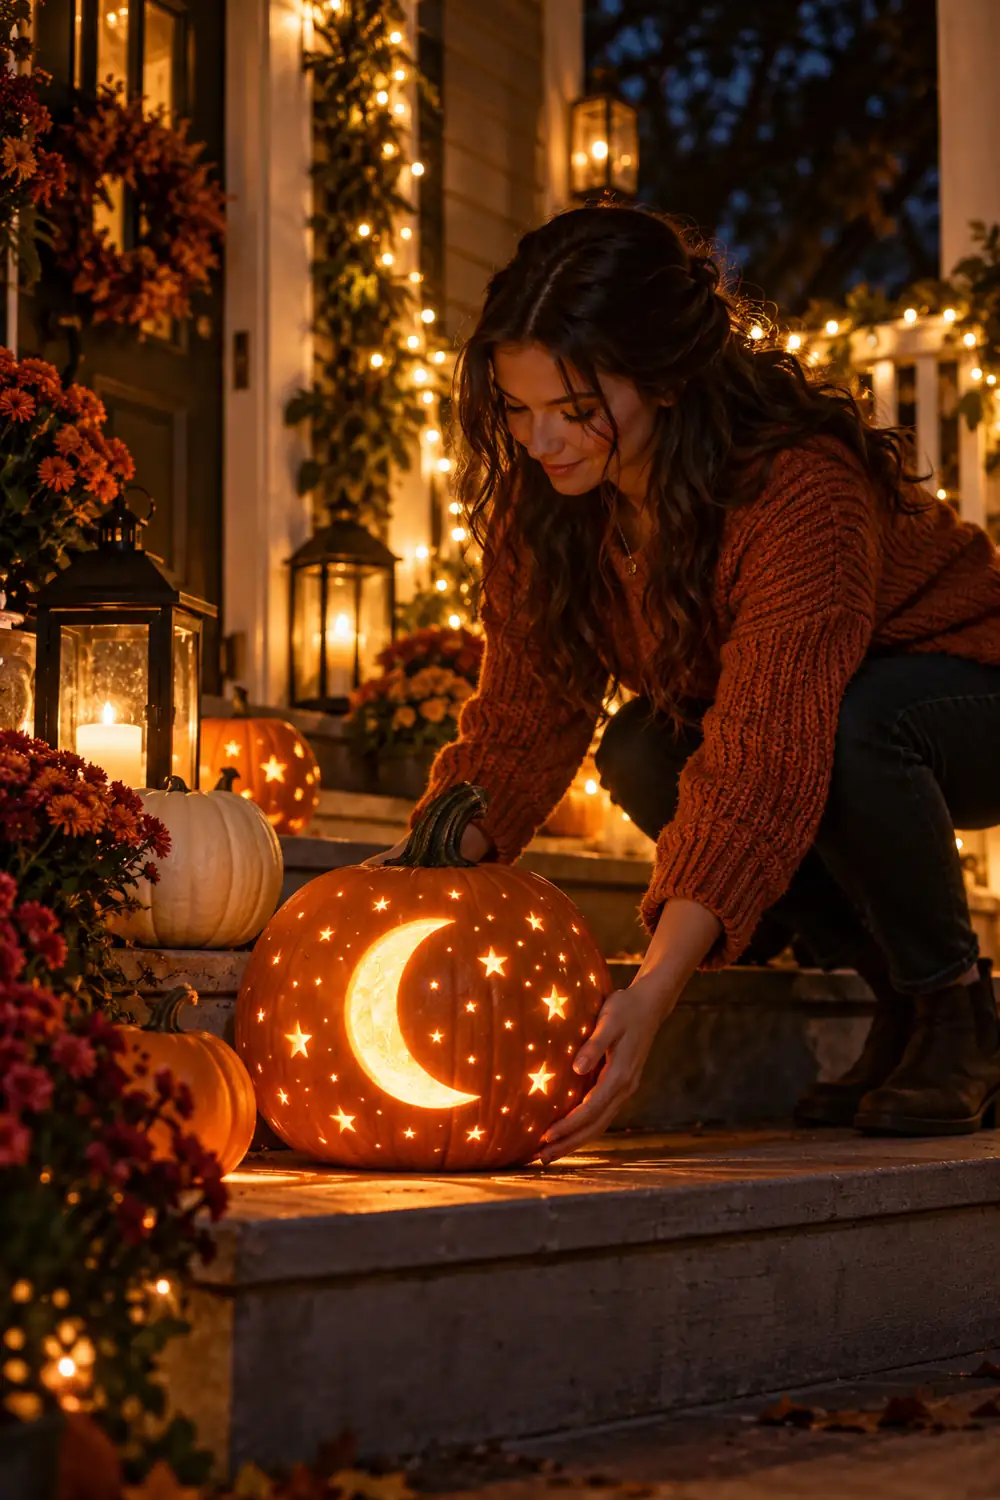
The moon is the easiest shape that still stops people.
Carve one large crescent moon on the front and scatter drilled star holes around it. Leave most of the skin solid so the moon stays crisp. Thin the wall behind the moon with a spoon so it glows brighter than the rest.
What to grab first
Hang it near the door at eye level. Moon pumpkins photograph beautifully.
6. Cluster Three Pumpkins at Different Heights
A single pumpkin on flat ground looks lonely after dark.
Group three pumpkins at three heights: step, overturned crate, ground. Give each a different expression. The height difference matters more than the designs, because staggered lights create depth a flat row never does.
- Brightest light goes in the middle
- Turn the outer two slightly toward the center
- Leave six inches between them
Step back to the curb when you finish. Adjust until the cluster reads as one glowing arrangement.
7. Shave the Skin Thin Instead of Cutting Through
Cutting all the way through is not the only way to let light out.
Relief carving means shaving just the outer skin so light shines through the thin flesh. It glows amber instead of harsh white. Sketch your design, then peel the skin inside the lines with a linoleum cutter or paring knife. Aim for orange-peel thickness.
Best for faces and animals. Solid shapes look almost painted when they glow.
8. Drop In Color-Changing LED Lights
A plain candle gives you one color. An LED gives you a show.
Battery puck lights with a remote cost little and change the whole mood. Set a slow fade and watch it cycle orange, purple, green, blue. Match the color to the design: green for witches, purple for haunted houses, red for vampires.
Keep spare batteries handy. LEDs always die on the busiest night.
9. Etch a Bare Tree Line Around the Pumpkin
Trees make any pumpkin look haunted without trying.
Wrap the design around the whole pumpkin, not one flat face. Etch bare branches skin-deep with a wood-burning tool or skewer so the lines glow amber. Tuck a tiny owl or bat into one gap. The wraparound rewards visitors who walk all the way up.
Work in good daylight. Fine lines are hard to see under a porch bulb.
10. Fade the Walls for an Ombre Glow
Flat light is boring. Graduated light is art.
Thin the inside wall more at the bottom, less at the top, so the glow fades like a sunset. Check progress with a flashlight inside a dark room. Keep the gradient smooth, with no sudden steps.
- Scrape the bottom third thinnest
- Leave the top third nearly full thickness
- Test in the dark before you carve the face
Carve a simple face over the gradient. The features will float in haze.
11. Punch Lace Patterns With a Leather Punch
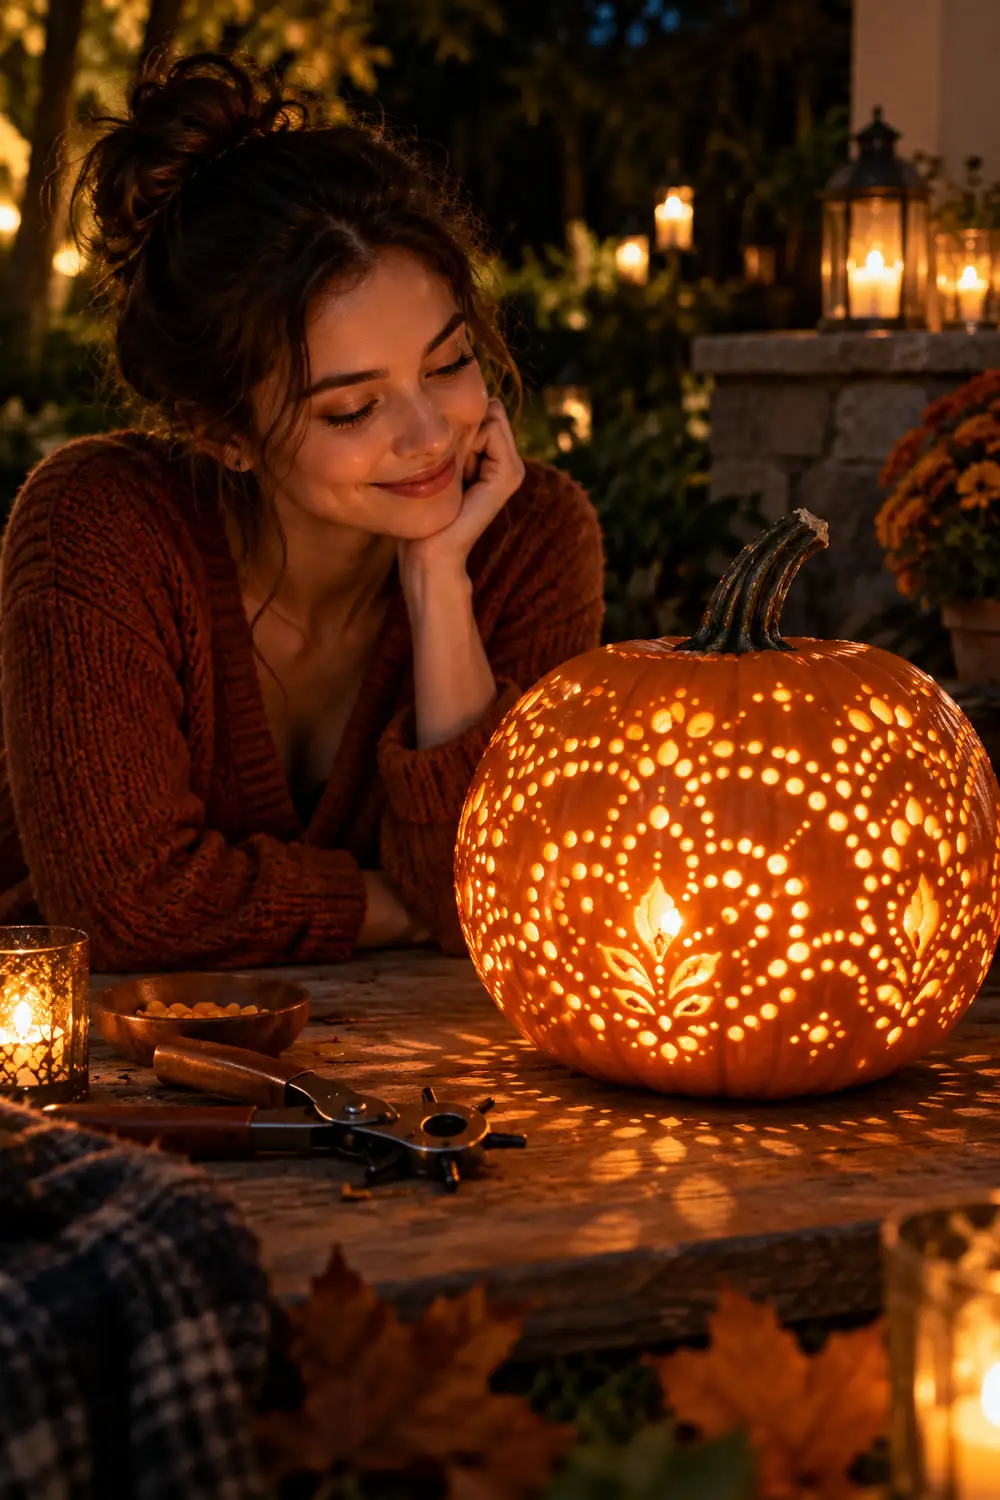
Intricate does not have to mean difficult.
A leather punch makes perfect circles in seconds, and a field of holes reads as lace when lit. Mark a border around the middle: alternating circle sizes or a ring of teardrops. Punch straight through, twisting slightly as you push.
Empty the punch often. Packed flesh makes ragged holes that leak messy light.
- Dot the pattern first so spacing stays even
- Punch on a cutting board, not your lap
- Back it with your free hand for clean punches
12. Crack Glow Sticks for Instant Bright Light
Candles blow out. Glow sticks do not care about wind.
Crack two or three sticks, drop them in, close the lid. Brighter than a tea light, zero fire risk, lasts all evening. Green and orange look most Halloween, but mixed colors marble through thin spots.
Use them on windy porches and near dried leaves.
Mix two colors in one pumpkin for a marbled effect.
Do not cut them open. The liquid stains.
Do not expect them to last past one night.
Buy thick party-size sticks. The skinny bracelet ones are too dim.
13. Offset the Pupils So the Eyes Seem to Follow You
The oldest haunted house trick in the book, and it still works.
Carve the eyes as ovals, then cut the pupils as smaller circles pushed to one side instead of centered. Straight on, the face looks normal. From an angle, the gaze tracks you as you walk past.
For more faces that scare after dark, browse these spooky pumpkin faces and pick one to light up on your own porch.
14. Silhouette a Witch Flying Past the Moon
Some scenes were invented for backlight.
Carve a large circle through for the moon, then the witch as a solid silhouette crossing it. She stays dark, the moon blazes behind her. Cut the broomstick thin and the hat brim wide so it reads from the street.
- Keep the moon at least four inches across
- Connect the witch to the edge so the skin does not collapse
- Add two small bats in the corners
Place it high, on a railing or hay bale. Silhouettes need distance.
15. Project Your Design Onto the Pumpkin First
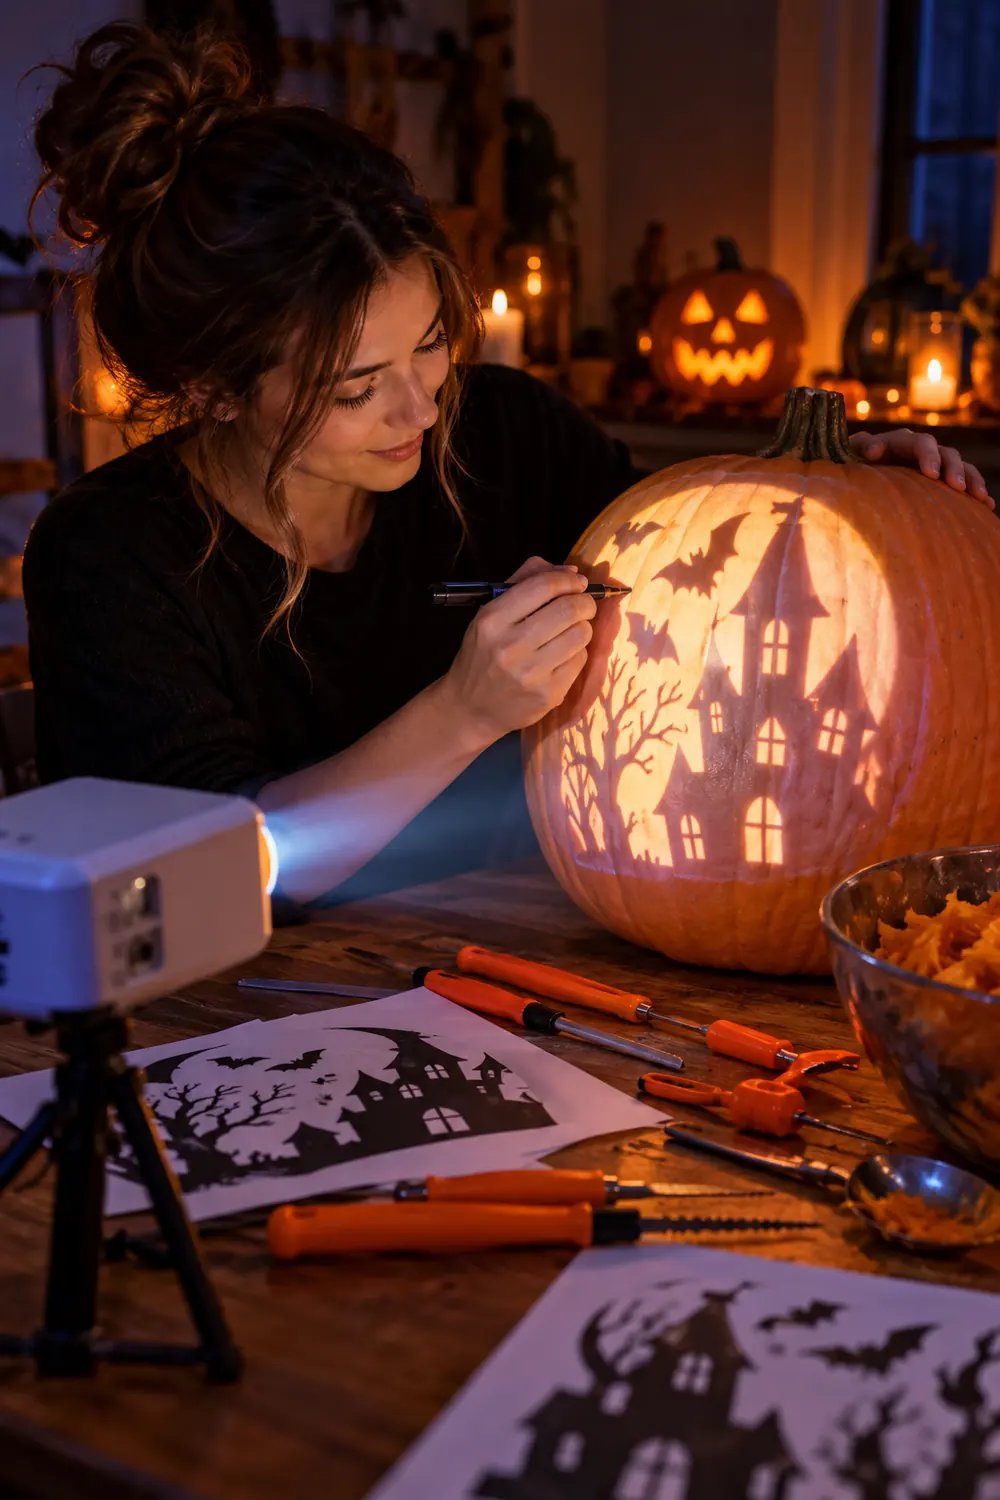
Freehand is brave. Projection is smart.
Tape a printed design to the wall, shine a projector or phone flashlight through it in a dark room, and trace the lines with a marker. Complex scenes transfer in minutes, and the light keeps everything proportional.
First-timers can warm up with these pumpkin-carving ideas for beginners before projecting a complex scene.
- Darken the room fully for a sharp projection
- Trace with a fine tip marker, not a thick one
- Photograph the traced design in case lines smudge
16. Set a Floating Candle in Water Inside the Pumpkin
Water doubles your light for free.
Pour two inches of water into the cleaned pumpkin and float a tea light on top. The flame reflects off the water, doubling the glow from one candle. The water also keeps the flesh moist, slowing the shrivel most pumpkins suffer by November.
Use a wide, stable pumpkin. Tall narrow ones tip when water sloshes.
17. Carve a Friendly Face on One Side, Scary on the Other
Why choose a mood when you can have both?
Carve a goofy grin on the street side and a snarl on the door side. Kids see the friendly face from the sidewalk. Guests who walk up get the scare. Two pumpkins of fun from one carve.
- Make the friendly face big and simple
- Make the scary face detailed and shadowed
- Turn it around mid-evening for a surprise
Chalk-mark the bottom so you remember which face is which.
18. Line the Inside With Foil to Bounce More Light
A dull interior eats light. A shiny one throws it back.
Press kitchen foil inside, shiny side toward the candle. It bounces light through every cut instead of letting flesh absorb it. Same candle, twice the brightness.
Crinkle the foil first. Texture scatters light more evenly than a flat finish.
19. Line Your Walkway With a Row of Lanterns
One glowing pumpkin is decor. Six is an experience.
Carve simple faces on small pumpkins and set them along both sides of the walkway. Keep designs simple; nobody studies these up close. The row guides trick-or-treaters like runway lights.
- Use LED tea lights so nothing blows out
- Space them evenly for the runway effect
- Weigh each with sand against kicks and wind
Light them thirty minutes before sunset. That moment when the path lights up is the best part of the evening.
20. Seal Cut Edges to Keep the Glow Fresh for Days
A wilted pumpkin glows like a sad lantern.
Rub petroleum jelly on every cut edge right after carving. It seals moisture and stops the flesh curling for extra days. Store the pumpkin in a cool garage by day, bring it out at dusk.
Light is half the design. Plan the light source before the first cut, not after the last one.
Skip the bleach soak. It barely helps and the smell lingers.
Night is when pumpkins earn their keep. Pick two or three of these glowing pumpkin-carving ideas and carve them this weekend, then watch your porch turn into the house everyone slows down to see. Remember that light does half the work, so choose the bulb, LED, or glow stick before you make the first cut. Pin this list for later so the ideas are waiting when October rolls back around and the pumpkin patch calls your name.